


How to Install an Underfloor Heating Manifold
If you’ve installed any wet underfloor heating systems you’ll know that the manifold is the central part. It’s where the pipework from each area converges, and where the supply of hot water from the heat source is fed/blended.
We’ve put together a manifold installers Guide to provide you with the knowledge and information you need to correctly install wet underfloor heating manifolds.
Please note; product specific design plans and UFH resources are provided with all of our systems, always refer to these when installing the underfloor heating and manifold.
How to Install an UFH Manifold
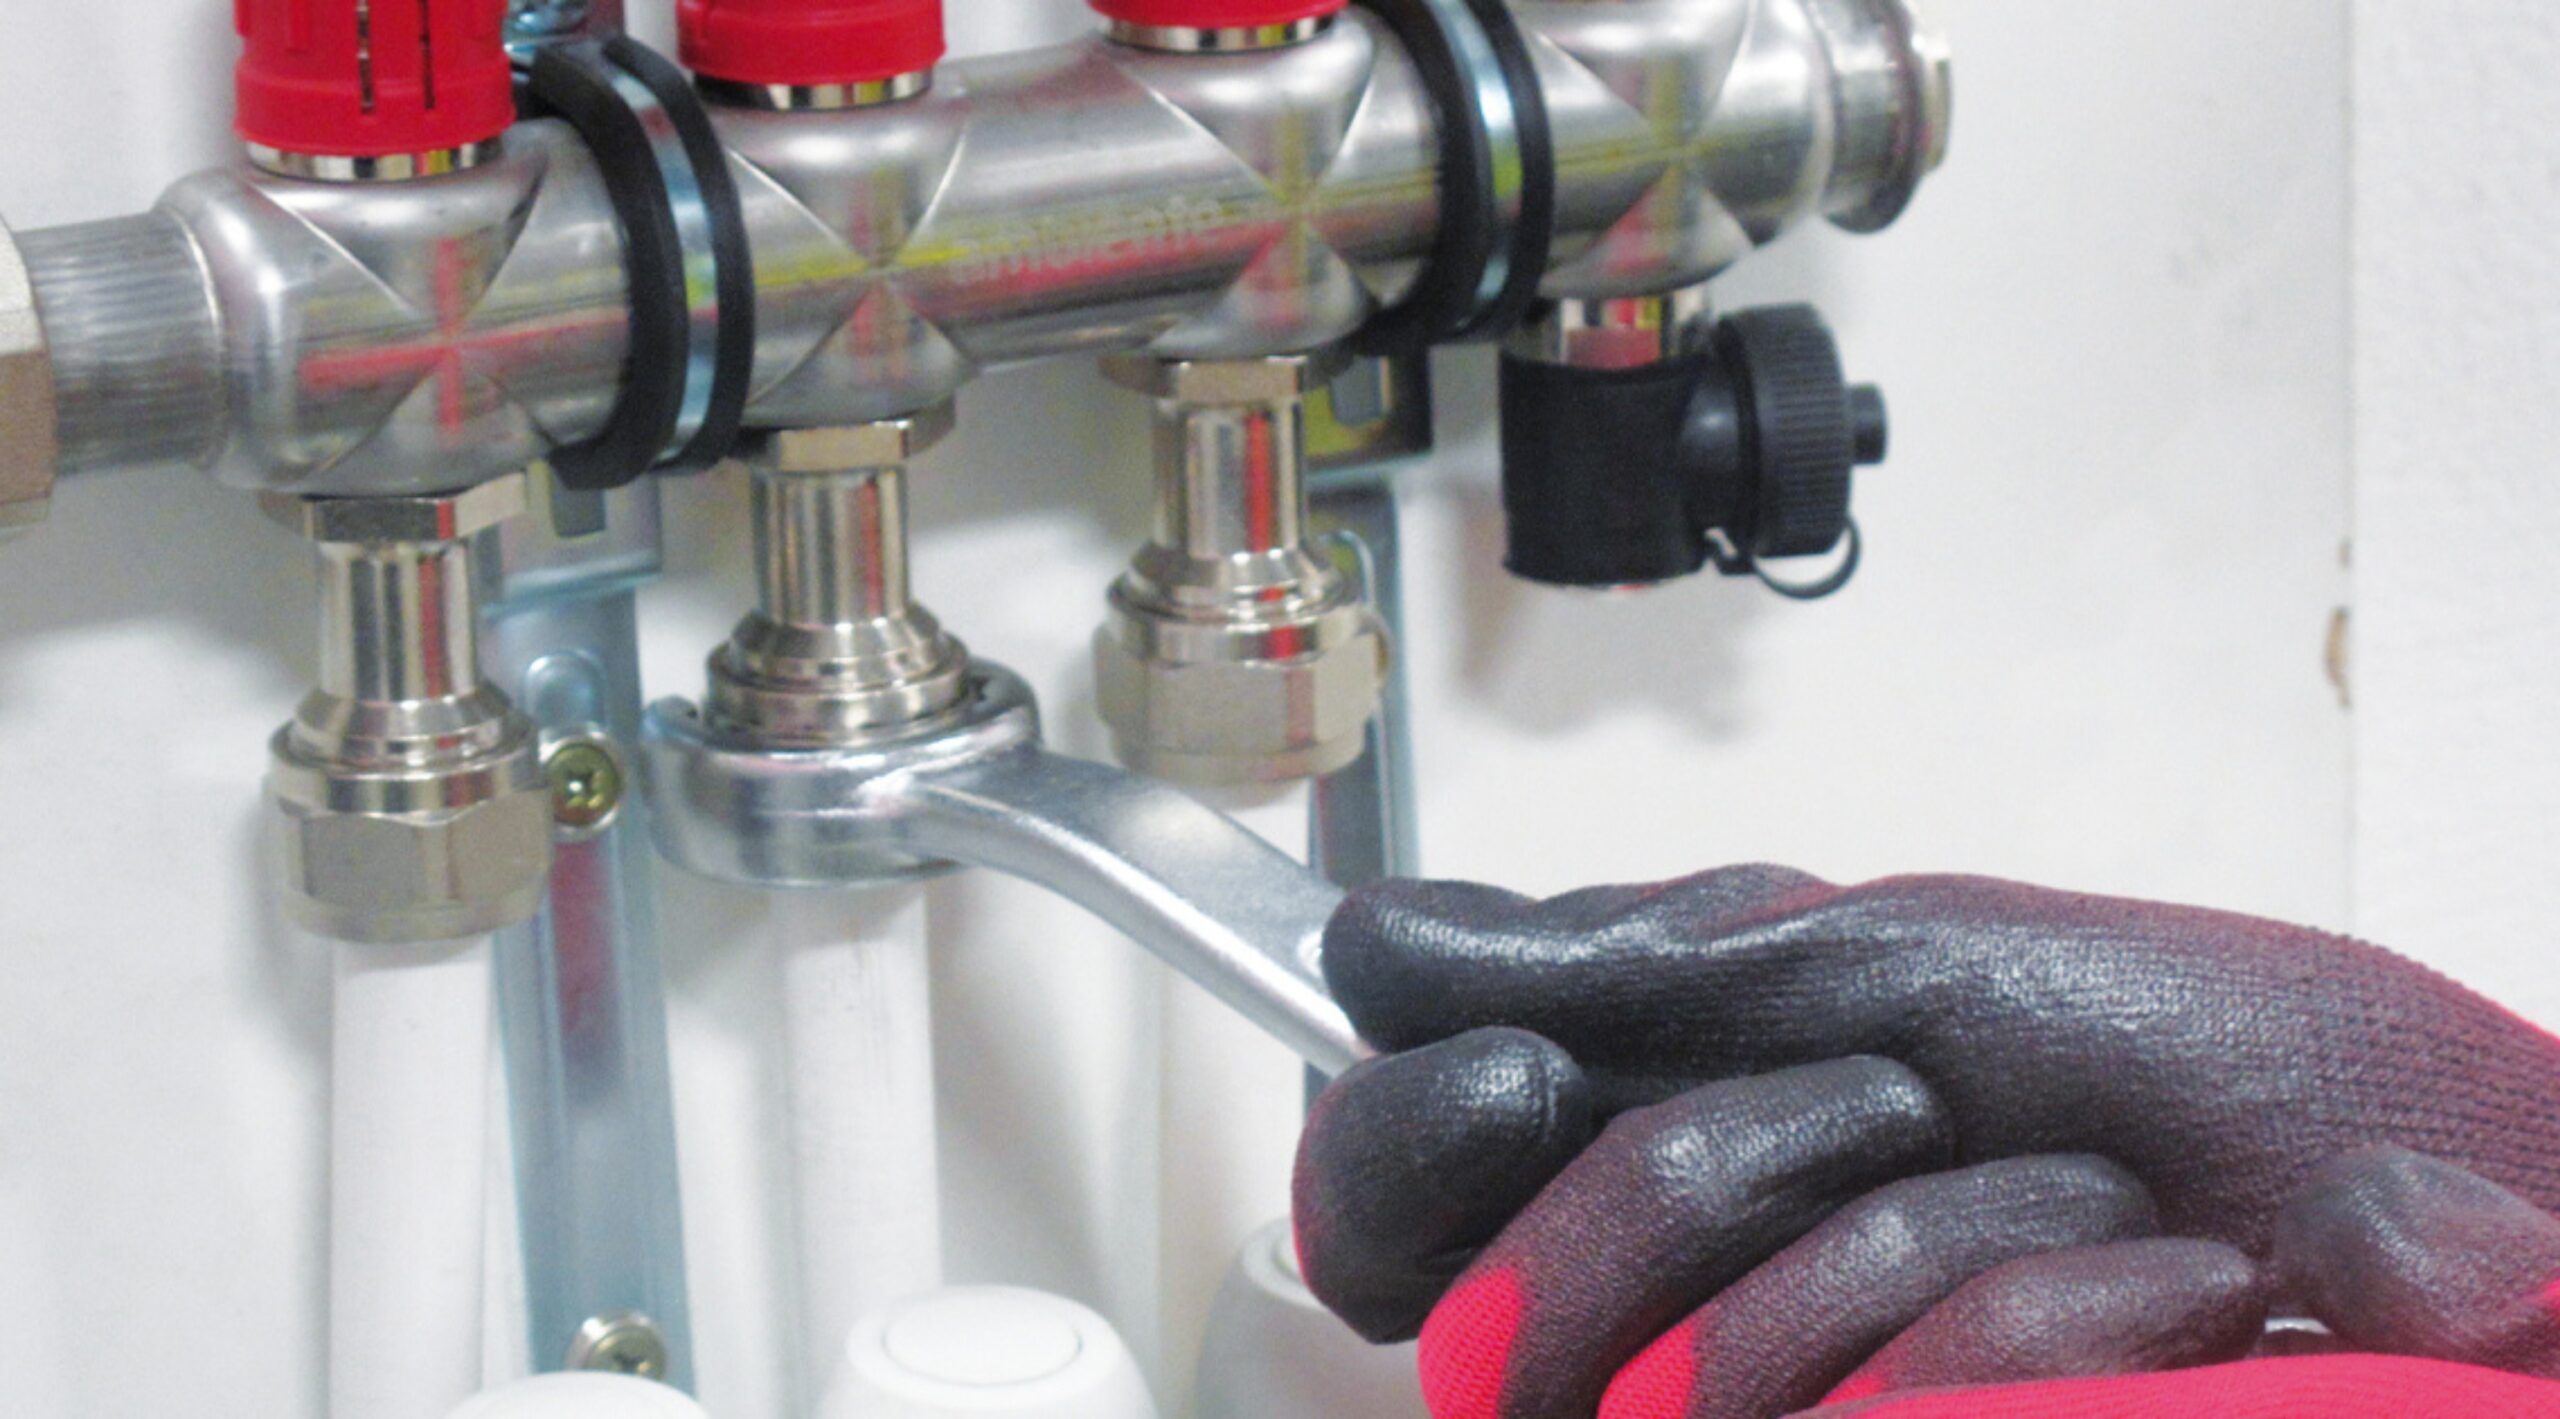
Ambiente UFH manifolds are supplied ready assembled and simply need mounting on brackets prior to installation. Once you’ve laid your cliprails and checked the underfloor heating system plans to see the number and length of each loop required, you are ready to install the manifold.
1. Starting on one side of the manifold, connect to the manifold flow bar. Make a note of which zone the loop serves on the manifold tag supplied.
2. Lay the pipe out, navigating the most efficient route between the manifold and the zone. Start laying the pipe into the cliprail, as per the system designs.
3. On completion of the loop, follow the same route back to the manifold and connect to the return bar (bottom bar with blue caps), making a clear note of the actual loop length installed on the manifold tag.
4. Follow the same procedure for all loops until the area is evenly covered with UFH pipe.
5. Once all loops are installed and connected to the manifold, the system can be pressure tested.
Note that the two manifold bars are offset so that the pipes can pass behind the lower bar for connection to the top bar – we recommend using the top bar as the flow and the bottom bar as the return.
Want to speed up installation?
Ambiente’s SpeedSpanner30 has been specifically designed for use with our manifolds, giving you 141° of turn on your manifold connectors, it can make manifold installations up to 7x faster!
Filling and Flushing the System
1. Close the isolating ball valves that are connected to the manifold on both bars.
2. Isolate all zones by screwing down the blue caps on the bottom (return) bar and the flow meters on the top (flow) bar.
3. Open the first flow meter (start furthest away from the filling valve) on the top (flow) bar (use the red collar to turn the black section fully anticlockwise, do not use grips – hand tight only). Ensure that all other flow meters are closed, except the loop that you are flushing.
4. Remove the black plastic blanking cap from the filling valve on the top (flow) bar and fit the hose connection/hose which should be connected to the mains water supply. Open the filling valve using the key on the reverse of the drain valve cap.
5. Fix a suitable hose to the drain valve on the bottom bar.
6. Fully loosen the blue protection cap on the bottom bar on the first zone to be filled.
7. Open the tap on the mains water supply and open the drain valve on the bottom bar using the key on the reverse of the blanking cap.
8. Run water through the loop until air is removed from the system, closing down the blue caps on each loop as it is purged.
9. This can now be repeated for each zone by opening the next zone, closing the flushed zone and repeating steps 3-8.
10. At this point the system can be pressure tested if required, by closing the drain valve and unscrewing all the blue protection caps – the pressure should rise slowly – allow it to rise to 4 bar and then close the filling valve and close off the mains water. This should be left for 24 hours to check for any significant drops in pressure.
Pressure Testing Using an Air Compressor
1. Close the isolating ball valves that are connected to the manifold on both bars.
2. Open all zones by unscrewing the blue caps on the bottom (return) bar.
3. Open all flow meters on the top (flow) bar – use the red collar to turn the black section fully anti-clockwise.
4. Open the filling valve using the key on the front of the blanking cap and connect the compressor hose up to it. Make sure the drain valve is closed.
5. Turn on the air compressor and allow the pressure to rise to 4 bar. Once the desired level has been reached, close the filling valve using the key on the blanking cap. This should be left for 24hrs to check for any significant drops in pressure.
Change the Handing of Ambiente Manifolds
1. Reverse the handing of the two manifold bars on their brackets.
2. Remove the mixing valve from the base of the pumpset by undoing the nut that connects the two together.
3. Unscrew the blanking cap from the base of the mixing valve. Note: this has a left-handed thread.
4. Then unscrew the pump connection from the top of the mixing valve. Again, this has a left-handed thread.
5. Rotate the mixing valve through 180° and swap the blanking cap and pump connection around.
6. Remount the mixing valve onto the pumpset, making sure you use the rubber washers provided.
Our installation guides also come complete with a UFH pressure test certificate to be signed off once the system is fully commissioned.
Common Problems With Underfloor Heating Manifold
If an underfloor heating system is not working as it should, there are a few common problems that could be the cause. These include:
+ Air in the system. To rectify this, you will need to bleed the air off the system using the air vent on the flow bar of the manifold
+ Incorrect or imbalanced flow rates. These are adjusted using the flow meters on the flow bar. The UFH design will give the correct rates at which these should be set
+ Blockage in the system. If the blockage is caused by a physical item, rather than air, the system will need to be flushed through, to free the debris
+ Did you find this article helpful?
If you found this guide helpful, be sure to check out our other blog posts for more tips, insights, and expert advice on all things underfloor heating.
+ Any questions on Installing UFH Manifolds?
If you would like more guidance on underfloor heating, get expert advice from our team at sales@ambiente.co.uk or by calling 01707 649 118
+ Not an Ambiente accreditied installer yet?
Benefit from a wide range of UFH systems and controls to suit every project, gain project leads from our extensive network of contacts and technical support from a highly knowledgeable expert team.